RockItCoin FAQs
How to Send Cryptocurrency in the RockItCoin App
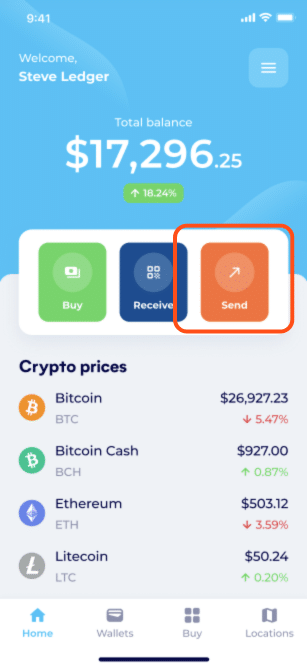
Step 1: Select “Send”
Once you have your wallet funded, you can send to any other wallet you’d like directly from the application. The first step to sending your cryptocurrency is selecting the bright orange “send” button located beneath the “Total balance” section of your Wallet’s page as shown below.

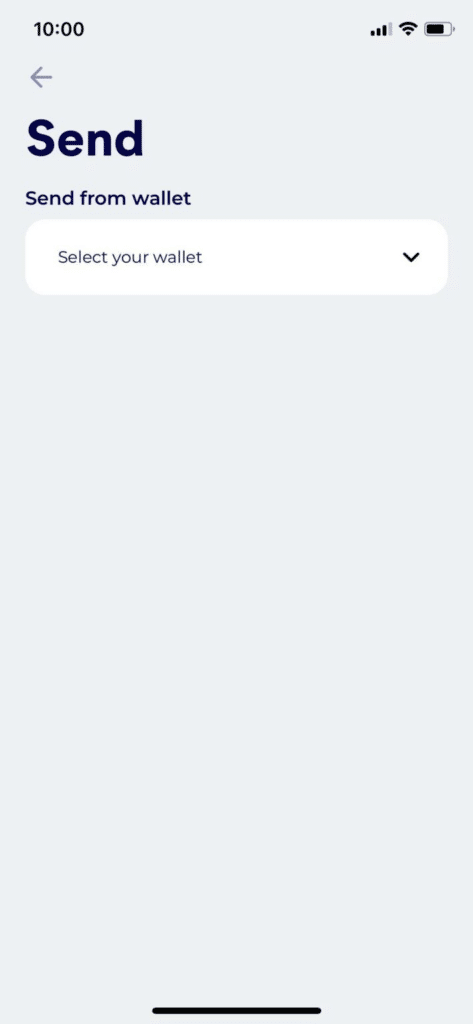
STEP 2: Select the sending wallet
After hitting send, it will ask which wallet you would like to send from. This will be selecting the individual wallet with your funds in it from the app. Hitting the “Select your wallet” dropdown, as shown below, will give you a list of your wallets held on this application, as well as the total funds held in each.

STEP 3: Enter in the receiver’s information
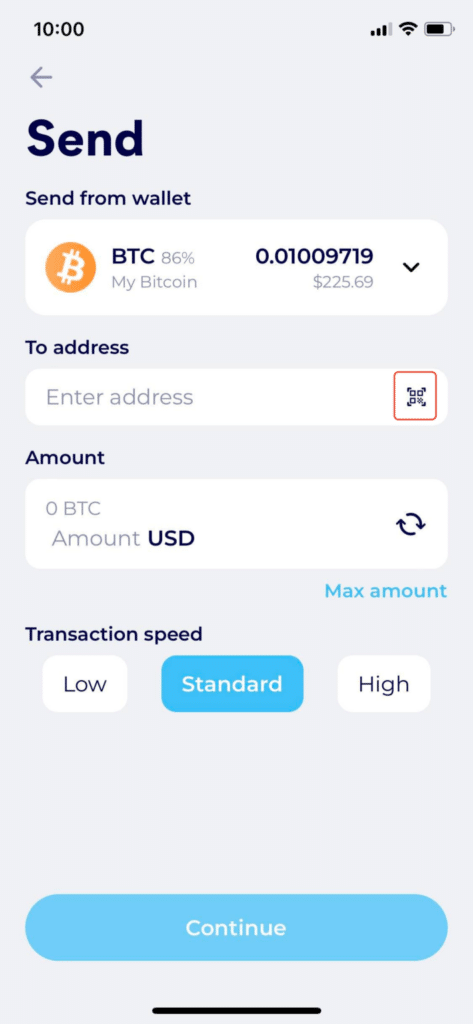
When the wallet you wish to send from is selected the page will look a little different, adding in the boxes needed for the receiver’s information. In the example below the BTC wallet has been selected:

Under your wallet you will see the “To address” bar. This bar is where you type in the receiver’s wallet address, or if you have their QR code you can select the small icon at the end of the bar, highlighted in red above, to scan their code instead of typing it in.
If you intend to send everything in your wallet to the receiver, click the blue “Max amount” button beneath the “Amount” section and it will fill this bar for you.
STEP 4: Select continue
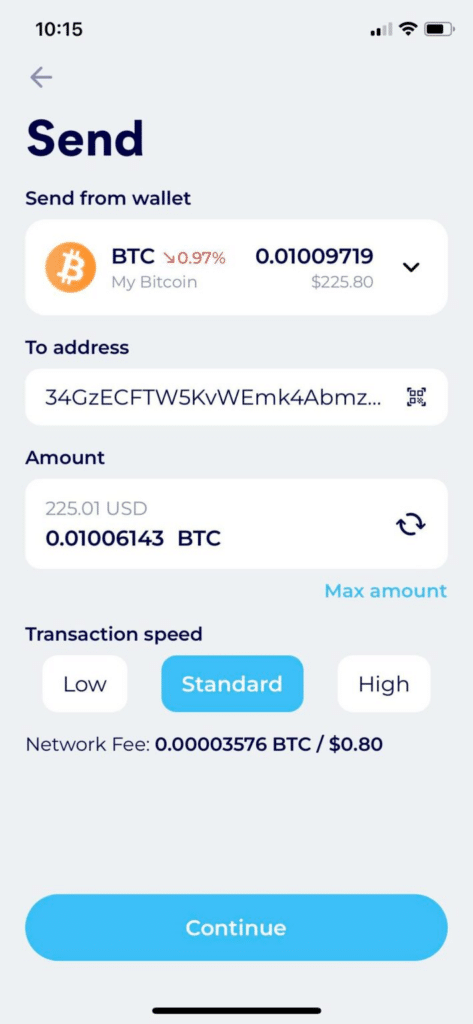
After entering in the relevant information, defining the amount, and either typing in the address or scanning the receiver’s QR code, your screen should look something like the example below:

The “Transaction speed” section can be ignored unless you wish to change how much is sent as a mining fee, however it will be set to “Standard” by default. Click the blue “Continue” along the bottom when you are ready to finalize your send.

Congratulations! You have successfully sent your cryptocurrency!

